Replacing a Checker Radiator
- by Paul Worth
- Mar 19, 2018
- 3 min read
Copyright 2018 - Paul Worth. Used with permission.
Fortunately for us, there is a readily available replacement radiator for our Checker automobiles.
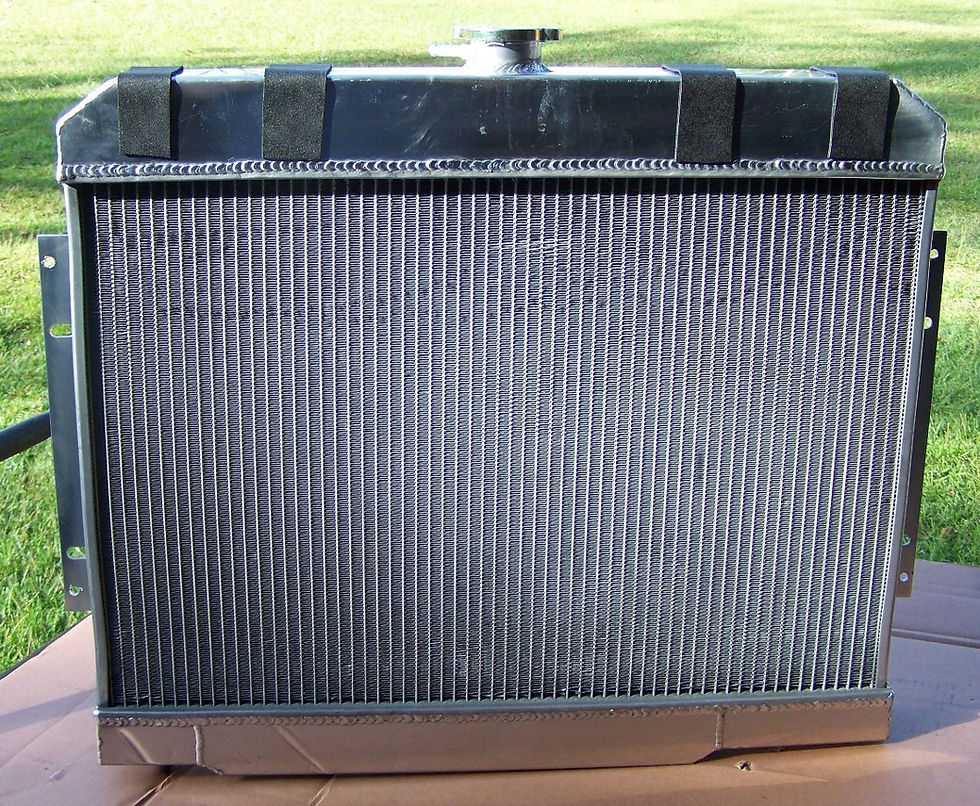
However, you will not find it at the local auto parts store listed under “Checker”. The radiator is one used when converting 1972 to 1986 Jeep CJs to small-block Chevrolet engines. Many off-road shops carry these, as well as some speed shops and auto parts stores.
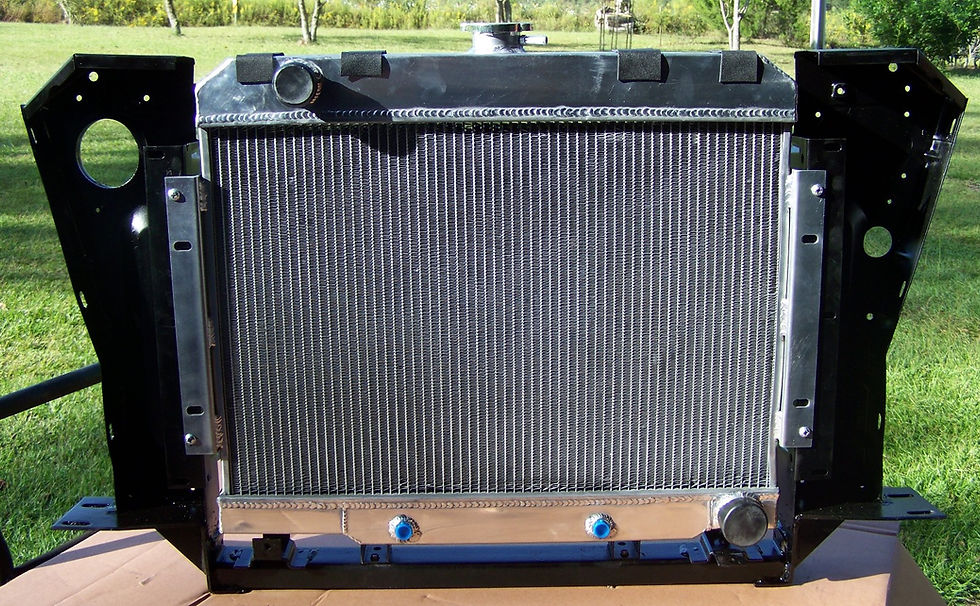
If you are searching online, use the key words “Jeep CJ V8 conversion” to find several listings. Some of them might have transmission cooler fittings on the bottom or no transmission cooler at all. You want the one with the fittings on the back (engine) side of the radiator.
This radiator is not a perfect plug-and-play fit but it is close enough that almost any shade tree mechanic can install it. The photos in this article are of my 1978 Marathon that is being converted to a pickup. This should work for most later Checkers. The bottom line is, if the support around your radiator looks like this (see drawing below) these instructions will work for you.

The first step is to remove the old radiator. This will involve (at a minimum) removing the top support and all the hoses. It will also likely involve removing the transmission cooler lines as well as the fan and shroud. You might find that removing the grille makes the job easier for you.
IMPORTANT: Remove the bolts that attach the hood latch assembly to the radiator support and replace them with shorter bolts! This will prevent the agony of accidentally punching a hole in the top of your new radiator.
The aftermarket radiator is thicker than the original. We are lucky that the new one is almost exactly the same size as the upper support WITHOUT the original rubber pads. Remove and discard these pads and glue some thin rubber strips to the top of the radiator where the pads would have made contact and also near the top corners.
I used some rubber garage flooring material I had on hand but I suspect strips from a bicycle inner tube would work just as well. Glue the rubber in place with contact cement.
The new radiator is not quite as tall as the old one. You can remove the lower rubber pads or leave them in place, doesn’t matter. You WILL need to bend the rear tab of the right (passenger) side lower support down (see photo) to make life easier when fastening the hose clamp and also to access the drain plug. Depending on the manufacturer, you might need to modify or replace the drain plug so that you have enough clearance to remove it later.
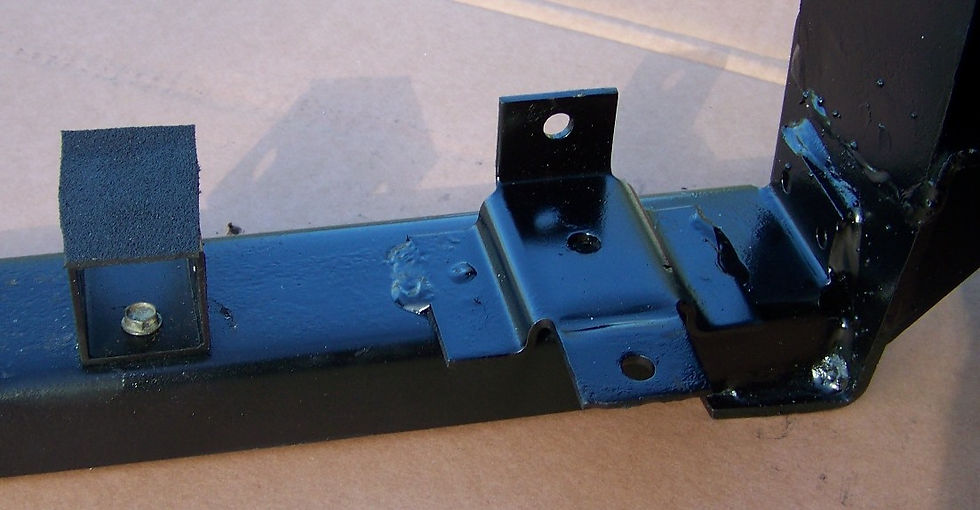
To raise the radiator to the correct height, attach two pieces of 1.25” square tubing to the bottom support beam (see photo) using screws or rivets. I used steel perforated (aka “punched”) tubing that I had on hand but any steel or aluminum tubing should work as long as it is the correct size.
Using contact cement, glue thin rubber pads (inner tube) to the top of the metal tubing.
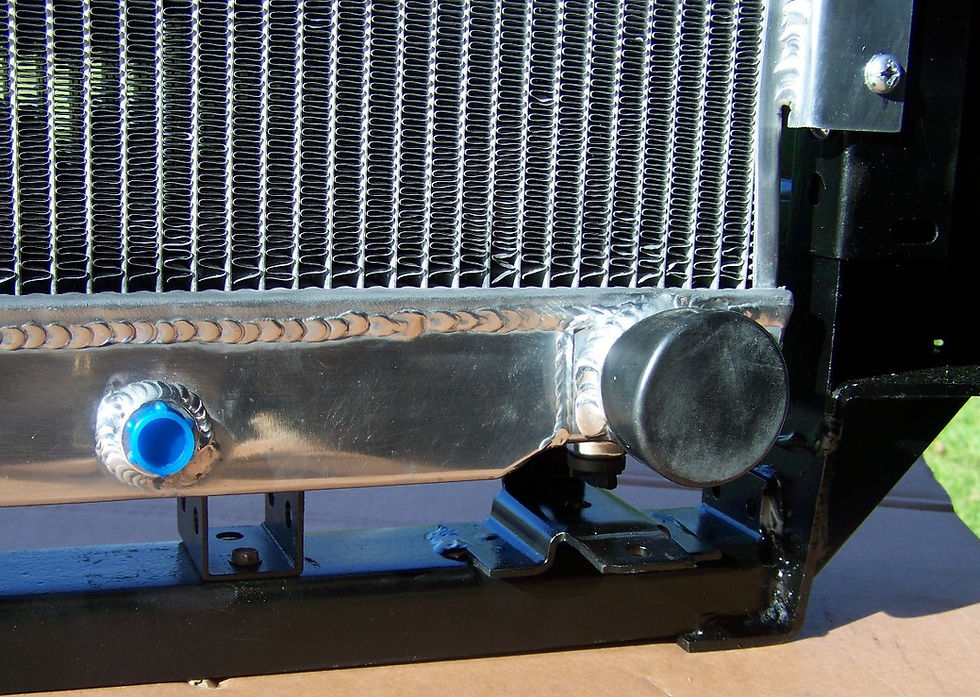
Your car should have the fan shroud support brackets to the right and left of the radiator. If not, you will need to make and install these. Some pieces of steel or aluminum angle stock will work for this. You will need two 15” pieces of 1.5” stock and appropriate bolts and nuts (or rivets) for attachment.
Place the radiator in the support for a test fit and mark the location for some bolts to attach the radiator mounting tabs to the fan shroud support brackets. Remove the radiator, drill the holes in the brackets (and mounting tabs if necessary) and replace the radiator, bolting it in place.
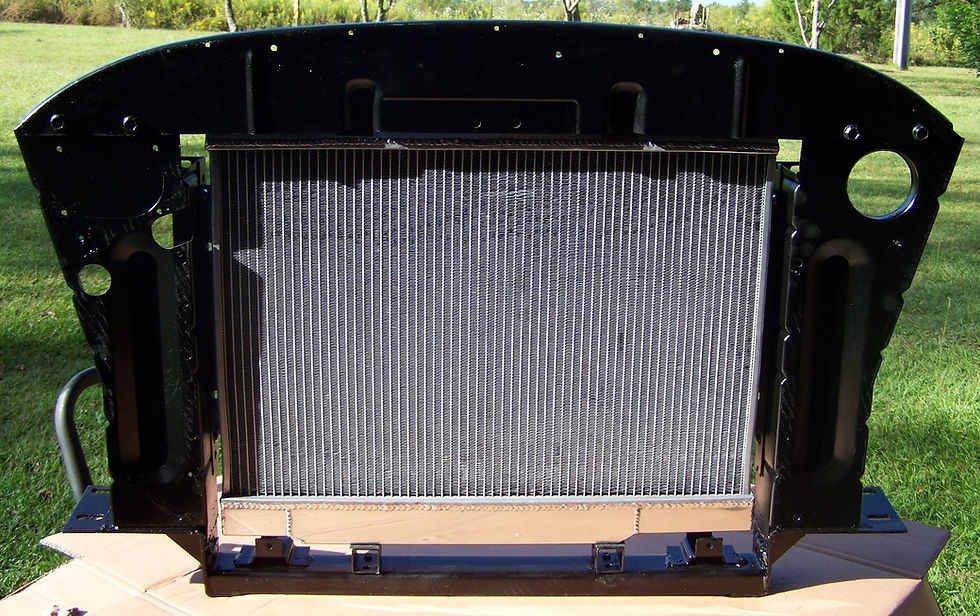
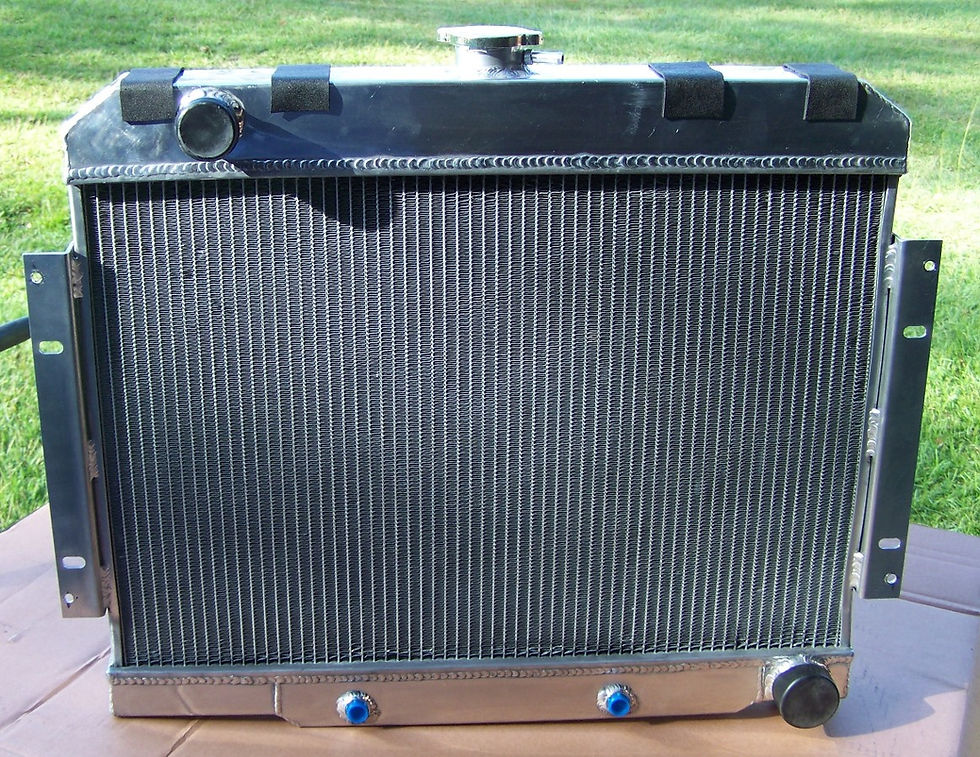
This is what it should look like, both front / grill side (above) and rear / engine side (below).
Replace the top support, checking for a snug fit. If the radiator feels “loose” in the support, install additional rubber strips as needed. Replace any additional parts you removed. This would be a good time to install new radiator hoses and maybe new transmission cooler lines. A new coolant overflow line (and perhaps tank) would be in order as well.
Congratulations! Your Checker should run cooler and be more reliable! A later article will address replacing the fan shroud and fan for even better cooling.


